
 Tracy Surgeoner demonstrates inclusive and accessible craft activities. Click on the photographs for larger versions. These activities were first shown on Together! 2012 CIC’s YouTube shows Together Unlocked! and Something for the Weekend.
Make a flower from old wrapping or coloured paper.
You need: Recycled wrapping paper or coloured paper, ruler, pencil, scissors, glue, and a paper straw or a skewer.
-

- Cut your paper into squares about 10cm x 10cm (the size depends how big you would like to make your flowers).
-

- Fold your paper square in half diagonally and repeat this twice to make a small triangle.
-

- Cut out a shape like the outline of your finger from the corner where the folded edges meet. Make this as big as you like.
-

- Unfold the cut out pieces to reveal your basic flower shape.
-

- Cut out one or two of the petals.
-

- These will be used as leaves.
-

- Bring the two edges of the petals together and then glue them to create your flower heads.
-

- Use the edge of your pencil or scissors to curl over the petals.
-

- You can make stems from paper straws (you can make one of these by rolling paper around a skewer and then glueing it) or anything else suitable you have available.
-

- Experiment with sticking the flowers onto stems in different ways, and adding the spare petals as leaves, to create different flowers.

These are the different flowers that Tracy has made this month.
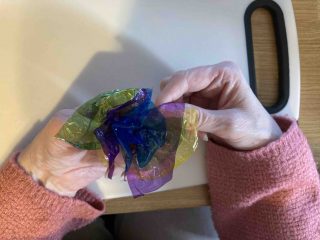
Make a flower from old sweet wrappers.
-

- To make this flower you will need: Scissors, glue or clear sticky tape, sweet wrappers, small elastic bands, drinking straw (or something similar to use as a stalk).
-

- Choose between 4 and six plastic sweet wrappers and flatten them out.
-

- Line your wrappers up on top of each other, then pleat them like a fan.
-

- Fix a small elastic band around the middle of the folded wrappers, and then open out the ends to look like a bow.
-

- Using your scissors, shape round the ends of the wrappers to get rid of the sharp corners.
-

- Lift and scrunch each layer (wrapper) to create depth and make the petals of the flower. Do this at both ends.
-
- This is all the petals scrunched and pinched to make the flower.
-

- Attach your flower to your stalk with glue or clear sticky tape. Make as many as you like to add to your bunch. Foil wrappers can be used to create colour flower centres if you choose.
Make a foxglove from wrapping paper.
-

- To make this paper foxglove you will need: some old wrapping paper, something circular to draw around, scissors, glue, pencil, and if possible, a long thin stick like a BBQ skewer.
-

- Use your circular object to draw 9 circles on the back of your wrapping paper.
-

- Cut out your circles.
-

- Cut each of your circles in half.
-

- Roll your half-circles around to create cones and glue the edges together.
-

- To create your flower’s stem, get another piece of old wrapping paper, about A4 size length-ways.
-

- Roll your new paper from one corner diagonally to create a paper straw to use as your stem – make sure you glue the end to keep your stem tight and strong.
-

- Glue your cones, with the open side upward, to your stem working from the top-down, leaving the bottom of your stem to hold or stand up in a vase or jar.
Make a decoration for your door using an old calendar.
-

- To make this decoration we used the first 11 months of our 2021 calendar and the card from a cereal packet, but you can use any old pictures and card. You also need a pen or pencil, scissors and glue.
-

- Cut your pictures into 32 rectangles, 16 a little larger than the others.
-

- Fold your rectangles into three sections along the longer side.
-

- Draw around a side plate onto your card, and then cut out the circle to create the base of the decoration.
-

- Draw a smaller circle inside using a saucer and cut out the centre to create a ring with an edge about 3-4cm wide.
-

- Collect your folded rectangles glue and ring together on a flat surface.
-

- Start by gluing your large rectangles to your ring, so they just overlap each other. Stick them straight out from the ring making sure that the folds all aim in the same direction, then glue the folds at the bottom corners.
-

- This is the first circle completed.
-

- Add your smaller folded rectangles in-between each of the larger rectangles. To finish, cut out a ring from any left-over calendar pages to glue over the edges.
-

- Add any additional decorations as you like — I made a bow from more paper — and display as you wish.
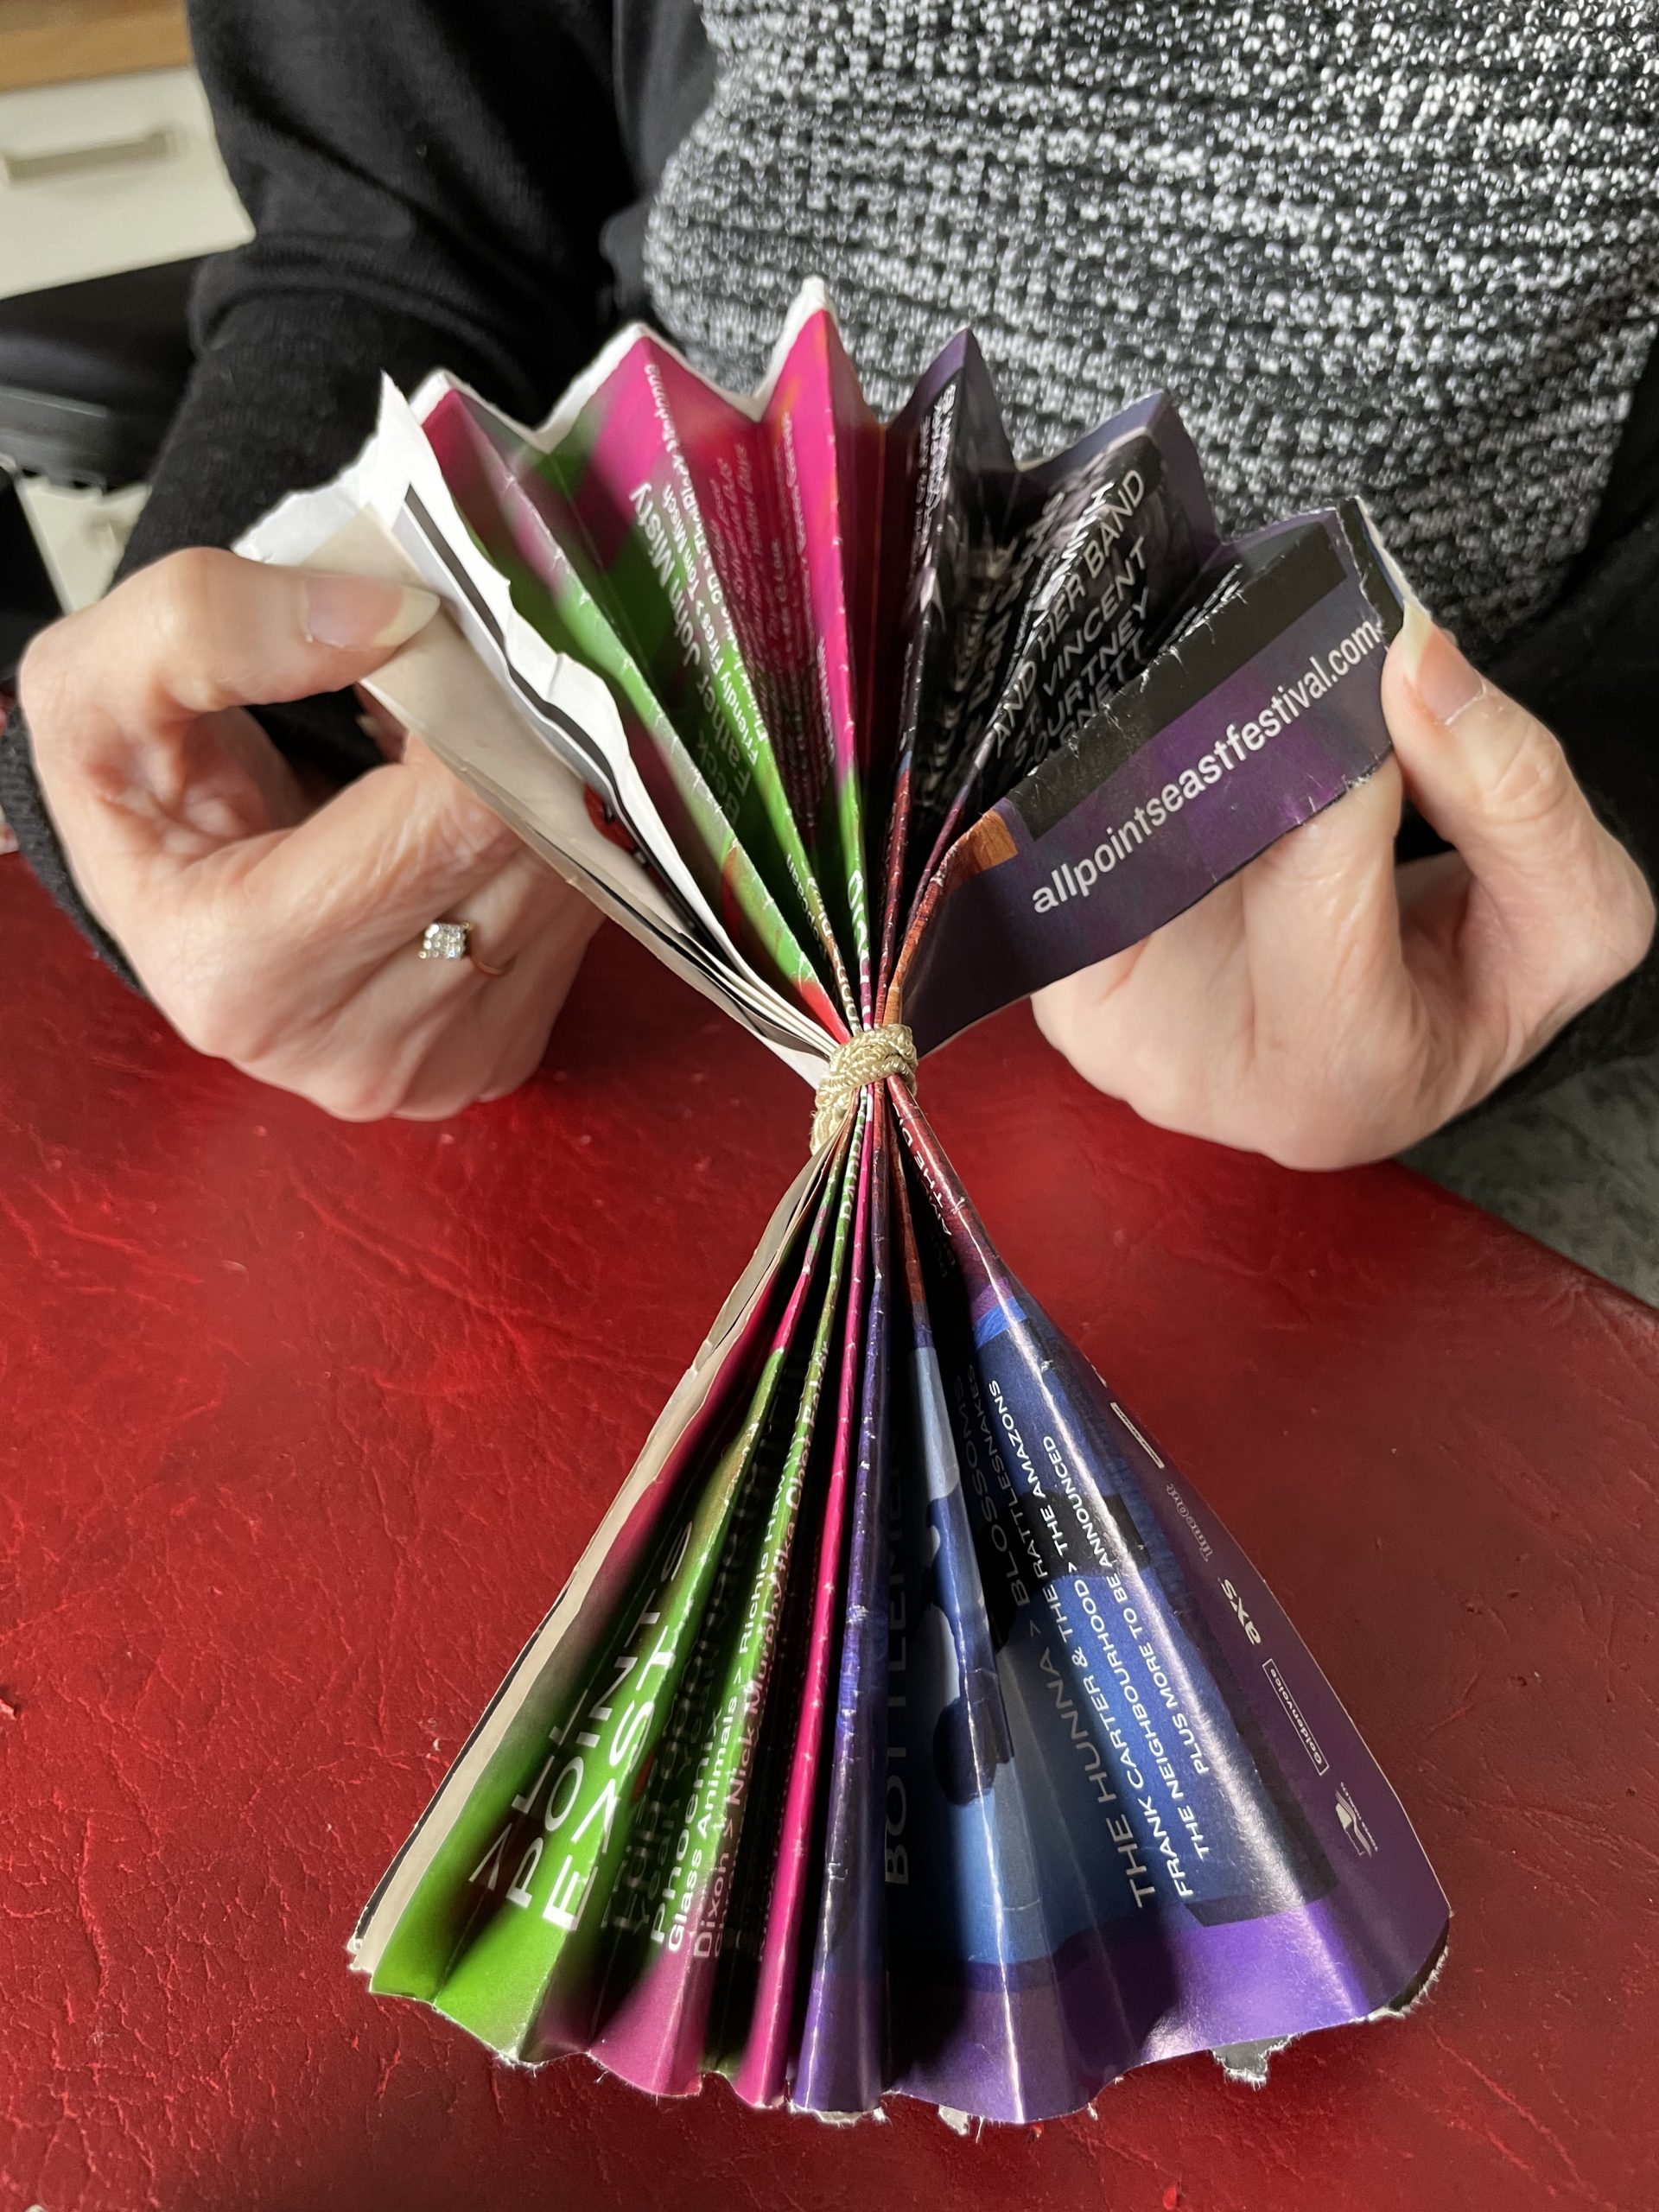
Make a tree decoration from an old magazine.
-

- All you need is a magazine, but you can also use glue if you want.
-

- Starting from the front page (or the cover if it is not too thick, otherwise remove it), fold the right hand top corner down and across the page until it meets the middle of the page, creating a triangle.
-

- Fold the page over again until the edge meets the middle.
-

- Fold up the bottom edge of your newly created triangle to create an edge at the same place as the bottom of your original page.
-

- Once you have your fold, reverse it and turn it up inside your folded up page to create the first part of your tree. You can glue your folds if you want to. depending on the stability of your folds and the paper in the magazine.
-

- Follow the same instructions for each page of the magazine.
-

- Lay your completed set of folded pages with the outer most page flat as a base and allow the pages – now branches of your tree — to fan out.
-

- Try different places to see where your tree works well.
-

- You can use two same-sized magazine and glue them back-to-back to create a completely round tree.
Make a hanging bauble.
-

- You need a toilet or kitchen roll tube, scissors, glue and a pencil, with paint and glitter optional.
-

- Squash down your tube a little and mark it into thin strips about 1cm wide.
-

- Cut up the tube along the pencil lines to make hoops.
-

- Now you are ready to create your bauble.
-

- Paint the hoops if you wish and leave them to dry.
-

- If you want, dip the edges into glue and then glitter.

-

- Get your hoops ready to join.
-

- Glue the two hoops together to create a cross, then add more hoops at different angles to fill out your bauble.
-

- Finish your bauble off by adding as many hoops as you like and then choose something to hang them by.
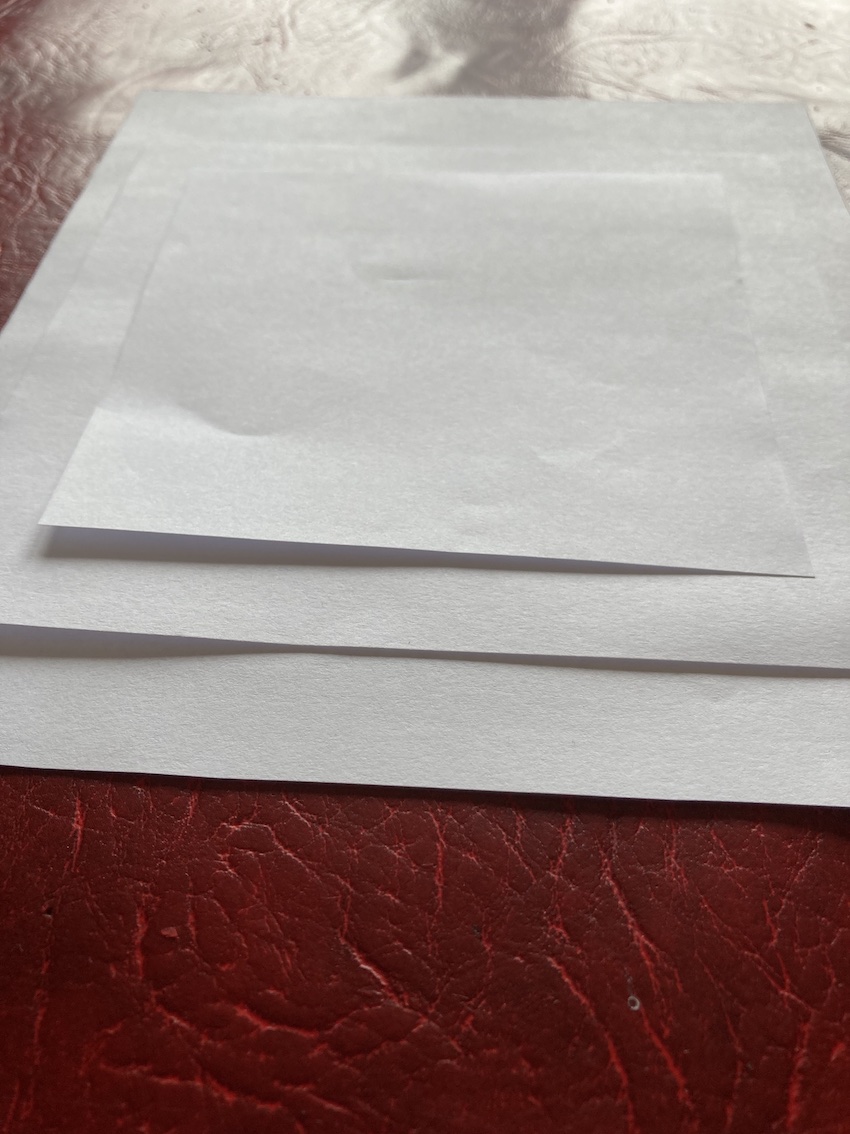
Make a paper bag.
Depending on the thickness of your paper you may want to glue two sheets together for strength. Use a ruler or hard edge to make you folds as flat as possible. Please also allow glue-drying time, depending on the glue you use. You can also view a YouTube tutorial here.
-

- You will need a rectangle or square of scrap paper, glue, ruler and scissors (not shown) and string, ribbon or similar for the handles.
-

- Fold all the way along the longer side about a quarter of the way up and then glue down the fold.
-

- Fold the paper to roughly a third along.
-

- Fold the other end over to overlap just enough for a strong glued edge, then glue the two ends together.
-

- Fold the bottom edge up again to approximately a quarter of the height.
-

- Then flatten out this fold by creating a V at either end.
-

- Now fold over both sides of this new bottom section again so they overlap enough for a strong edge, then glue this together including all of the corners.
-

- Next fold over the long sides to create bottom corners by folding in to make a triangle in each corner, and make a rectangle overall. Unfold and fold back to the other side to create a good edge.
-

- Once the glue is dry you can open up your bag, just like one you might have previously bought.
-

- Make a handle out of anything you like that will work.
Paper Coil art. (See Join in with Tracy below to see how to make the paper rolls.)
-

- To do this you need scrap paper, scissors, backing card/paper, pencil, glue (preferably liquid), and a paint brush. Cut your scrap paper into lots of thin strips, trying to keep them roughly the same width, plus a few wider strips for creating rolls.
-

- Create lots and lots of coils, and some long rolls.
-

- Draw the outline of the shape (in this case an owl) that you wish to create.
-

- Make the outside of the owl shape using the rolls and then fill in the space as you want to create the body of the image.
-

- Stick your paper shapes into place using your glue. Remember to allow time for them to dry.
-

- Now create the base with more coils.
Make a figure from recycled paper. (See Join in with Tracy below to see how to make the paper straws.)
-

- To make this you need scissors, enough scrap paper to create 20+ paper straws with some to spare, liquid glue and glue pot, a paint brush and cotton thread.
-

- Create a cross with two of the paper straws, then bend six more in half before fold three of these over either side of the cross.
-

- Gather the ends of the folded straws and then wrap, tighten and tie a length of cotton, wool or string towards the bottom of the gather to create your figure’s waist.
-

- Build up your figure’s head by wrapping and shaping pieces of wastepaper and gluing them together – a little like papier-mâché. Allow the glue to dry before proceeding.
-

- To create the bottom half of your figure, build up a skirt of paper straws by adding and gluing each one at a time and working your way around until you are happy with the size of the skirt. You may need to take breaks to allow the glue to harden.
-

- Make a couple of wider straws, flatten them and then glue and wrap these around the middle of the figure to create a broad waistband and help keep the skirt pieces in place.
-

- Flat and wrap a couple of thin straws just below the arms to create a top, and bend the arms halfway as elbows. Wrap a thin roll around the head to create a head scarf (optional)
-

- Trim the skirt to all the same length to create a steady base.
-

- Tracy’s final figure.
Make a basket from paper or card.
-

- To make this you need: scrap and or coloured paper, ruler, pencil, scissors, glue.
-

- Draw a box 20cm X 22cm then draw a line 7cm in from each edge to create a grid.
-

- Cut out a cross from your grid and then mark out each side into 1cm wide strips.
-

- Cut the strips carefully right up to the edge of what will be the base of your box.
-

- Using your ruler, fold up your strips to create the edges to weave into.
-

- Cut a piece of A4 paper or scrap paper into 1cm wide strips using the longer side.
-

- Start weaving your long strips through your cut edges you have made to begin to build the sides. Glue each corner as you go round.
-

- Build up your layers. Remember to alternate your start point inside and out on each layer.
-

- Once you have built up your layers you need to fold over and glue down every other tab that folds over your weave on the inside of the box. Then cut off the remaining tabs at the same height as your folded tabs to create the top edge.
-

- Use your basket to store whatever you like.
Make a bird bath and feeder.
To make the bird bath you need:
- A clean empty plastic butter/spread tub/ice cream tub
- String
- Scissors
- Paints and paintbrush (optional).
-

- Make holes in each of the corners towards the top rim for the string.
-

- Attach two lengths of string to opposite corners.
-

- Decorate the outside of the container as you want.
-

- Hang and then fill with water.
To make the bird feeder you need:
- A clean empty plastic milk or drink bottle
- Skewer / Pencil
- Pen
- Bird food
-

- Mark and cut a small bird sized hole about halfway up your bottle.

-

- Pierce the centre of your lid and thread through some string and knot it underneath, then put the lid back on.
-

- You can also push a skewer or similar through the bottle to create a perch.
Now fill your feeder up to the hole with bird food before hanging it.
Make 3D letters.
You will need:
- Cereal box or similar
- Scissors
- Ruler
- Pencil
- Glue
- Toilet Roll Tube
- Stuff to decorate with
- Paper, ribbon, colour card, felt tips paint etc… for decoration
How to Make:
- Cut box open to make a flat area
- Cut 1 side in half
- Draw your letter as a capital on the coloured side of your box
- With the remaining strips make some boxes to build you 3D letter shape with by sticking them to the cut-out letter you have already created
To Decorate:
- Once you have created your 3D letter decorate in any way you choose for yourself or in a way the person you are making it for will like.


Make an underwater diorama.
-

- To make this you need an egg box (or similar container), old magazines, a plastic bag, a rubber band, and some scissors and glue stick.
-

- Tracy started by making a jelly fish from a plastic bag and rubber bands.
-

- Then Tracy cut out relevant shapes from old magazines and also drew some.
-

- Tracy started adding the shapes to the egg box, glueing them as necessary.
-

- Tracy bends the cut-out shapes to give them a sense of movement.
-

- Tracy also added some paper frames.
-

- Here is the final diorama.
Modelling with salt dough Part 2 (see below for Part 1).
-

- Use acrylic or oil-based paint to decorate salt dough creations – water-based paints will make the dough soggy.
-

- A little paint goes a long way so re-use plastic packaging to hold small amounts.
-

- These beads were made by rolling them around a barbecue stick and then dropping them into paint.
-

- Tracy also tried making a rose.
-

- Tracy’s first experiments are complete.
Modelling with salt dough Part 1. Mix one cup of plain flour with half a cup of water and half a cup of salt to make the dough. Once you have made your model, you can leave the dough to dry (this takes about two days), or cook it in the oven or microwave (check every ten seconds if you use a microwave). Then it is ready to paint.
-

- To make salt dough you just need to mix plain flour with salt and water.
-

- Wrap some of the dough in cling film and put it in the fridge to use later.
-

- To make a teddy bear, cut or break the dough into different sized pieces.
-

- Roll it into balls to make the teddy.
-

- Flatten out the largest ball to make a base.
-

- Next Tracy experimented with making a hand-shaped bowl.
-

- Roll the dough flat, then draw around a hand and cut it out.
-

- Leave the dough to air dry over a bowl.
-

- Tracy also tried experimenting to make a flower.
Make a collage picture from junk mail.
-

- All you need is some junk mail or recycled brochures and magazines; some scissors; a glue stick; and a plain piece of paper or card (or use the inside of a box).
-

- Cut out pictures of things you like and interesting shapes.
-

- Start building your picture by placing your cut-outs on your card or paper.
-

- Once you are happy with a section, glue it down.
-

- Build each section and be as creative as you want.
-

- You could also draw or colour on to your picture to add content if you want.
Make a greetings card from paper and recycled card.
-

- To make your card you will need an empty cereal packet or similar, scissors, felt-tipped pens or pencils and a glue stick.
-

- Open up your cereal packet.
-

- Draw and cut out a square (this will make a rectangular card when folded) or a rectangle.
-

- Now cut out a slightly smaller piece of plain paper.
-

- Glue the paper onto the printed side of the card.
-

- Fold your card in half. The plain paper goes on the inside for a message.
-

- Decorate the front of the card with a drawing or stickers.

Make Pom-poms from recycled card and wool (you can also use string, ribbon, or strips of plastic or fabric). Pom-pom making is a favourite activity of ours and is enjoyed by people of all ages.
-

- You will need, card, wool, scissors pencil and two round things to draw around.
-

- Draw around your circular object to create two large circles on your card.
-

- Use a small circular object to draw a smaller circle in the middle of each large circle and then cut them out with your scissors.
-

- Cut out a V shape in both circles Start to wind your wool onto the card.
-

- Keep going until the card is full.

-

- Carefully cut around the outside of the wool, making sure you hold it all together.
-

- Get a long piece if wool – put it between the two pieces of card, wrap around, pull really tight and tie it up tightly. You can use the remaining thread to hang it from.
-

- Remove the card and fluff up your ball of wall into a Pom Pom.
Pouring paint to make a picture
-

- To do this you need thick paper or card, poster paint, and the bottom of a plastic drinks bottle.
-

- Mix your paint with a little water to help it pour.
-

- Cut off the end of the bottle and place it in the middle of the paper. Pour paint over the bottle to create a shape.
-

- Repeat this with different colours.
-

- Repeat this with different colours.
-

- Remove the bottle end and use a stick or paintbrush to pull out the colours.

-

- Leave the painting flat while it dries.
Make a picture frame out of recycled card

Find some card from your recycling – old cereal packets, boxes or junk mail – and select a picture to frame. You will also need scissors and a glue stick.

Cut some strips of card.

Cut out a piece of card slightly bigger than your picture for the backing – and then cut out a groove in the top so you have space to put your picture in.

Create the front of the frame by placing pieces of card around the picture – experiment until you are happy.

Now glue them together.

Glue the backing card to the frame with the groove at the the top open ready to put your picture in.

Go back to your recycling and find a stiff piece of card that you can bend over and glue to the back, so your frame can stand up.

Just add your picture to finish.
Make a mini Top Hat from card (you can make a full-size hat using a bigger piece of card).

To make this you need a piece of A4+ card (recycled works well); scissors; a glue stick; a pencil; and something to help you draw a straight line.

Turn the card sideways and rule a line across the card about a third of the way up.

Take the larger piece of card and cut into it along the long edges at about 1cm intervals. Then start at one edge and alternately cut off the card or bend it up at the edges.

Glue one end of the straight edges and join it together with the other straight edge.

Fold the flaps in at one end and out at the other end.

Draw around the end of the hat (use the end with the flaps folded underneath) on the card that’s left. Cut out the circle and glue it round the edges, then stick it over the end of the hat that has the flaps folded underneath.

To make the brim, find a saucer, mug or plate to draw round – it needs to be bigger than the circle you have just cut out.

Cut the circle out, then cut out the centre – it’s easiest to do this by folding it over and cutting a half-moon shape. Start by cutting out a small circle, then test it (see the next picture) and if it’s too small to fit over the hat, make the circle bigger.

Slide the circle over the hat and glue it to the flaps that are sticking out.

You can decorate the hat with ribbon, stickers, fabric or anything else you have available, or paint it.

You can sellotape the hat to a hairband, or use hair clips to keep it in place.
Make a set of 3 ‘Russian dolls’ that fit inside each other from folding paper.(Dolls like this can also be used by directors to ‘block out’ stage moves, in which case make the dolls all the same size and store them flat. Add photos of the performers’ faces if they have already been cast instead of drawing identical faces.)

You need three square pieces of paper in different sizes, a pair of scissors and a glue stick, plus something to draw or decorate them with.
You can create a square piece of paper from a rectangular piece by folding over one corner to meet the other side and trimming off what is left over.

Begin each doll by folding the paper so that the opposite corners join to make a triangle

Take the right side point and fold it over toward toward the opposite side.

Take the left side point and fold it over to meet the fold on the right.

Take the 2 open triangles at the top and fold down flat.

Use a glue stick and stick 1 triangle onto the folds.

Then tuck the final triangle into the opening. This will give the shape stability and also a space to slide the smaller dolls in.

Your first doll is now ready to decorate.

Be creative and have fun decorating your dolls using pens, paint, pencils, stickers or anything else you have available. You can also use photos for the faces.
Paint without a paint brush.

You need a box lid, a fork, and whatever paints you have available – the thicker the paint the better.

Squeeze some different colours of paint into the centre of the box as thickly as possible. Experiment by putting some colours straight on top of others.

Now take the fork and mix it up.

Tracy’s final picture

Tracy made her second picture using a tea spoon, a meat tenderiser and a pastry brush.

Can you see a whale rising out of the sea while birds fly past in the cloudy sky?
Make an artist’s paint palette from bottle tops and an old CD/DVD.

You will need: An old cd/dvd, some bottle lids and waterproof glue – a glue gun is ideal if you have one available.

Arrange the lids on the disc in a pattern you like.

Apply glue to the tops of your lids then stick them to the disk.

Add a different colour paint to each lid. Use the hole in the middle of the disk to hold the palette on your thumb.

Make a drinks coaster from recycled bottle tops.
You need 7-10 plastic bottle tops, greaseproof paper and an iron and ironing board.

Spread the greaseproof paper on the ironing board first. Then place the largest bottle top (if the sizes are different) in the centre and put more bottle tops round it to create a circular/flower shape.

Place another piece of greaseproof paper over the bottle tops. Heat the iron and then push down firmly on the bottle tops.

Turn the greaseproof paper ‘sandwich’ over and iron on the other side.

Remove the greaseproof paper to reveal your new coaster.
Create a framed flower picture using recycled materials.

You need: a toilet roll inner, scissors, the lid off an empty box of chocolates, and some paint.

Trim the edges of one end of the toilet roll, then dip it into the paint and use it to print on the inside of the box.

Finish off the picture with pens, pencils or whatever you have available. Now think about print projects that you could create using other household objects to print with.
Make paper flowers using things you already have at home.


All you need to make these paper flowers is some kitchen towel (or other paper), scissors, pencil or stick, and Pritt or a similar light glue.

Begin by folding the paper like a concertina (pleating it).

Cut into the folded edge at regular intervals.

Unfold the paper and glue along one of the edges.

Glue the two sides together.

Now start to wrap the paper around the stick or pencil you are using for the stalk.


You can use a variety of different coloured papers to get different effects.
Make a Suffragette rosette or paper flower from recycled junk mail or magazines.

You need 5 sheets of paper from an old magazine or junk mail, plus scissors, and a rubber band or piece of string.

Stack the 5 sheets of paper on top of each other with the colour you want to be dominant at the front. Then fold them like a concertina or series of pleats.
Secure the centre tightly with the rubber band or string. Use the scissors to round off the edges of the paper at each end and then start opening it up.

As you open up the paper, pull up the top 4 layers to create a rosette or flower. You can add a pin or a stick at the back.
Create a box frame picture from bits and pieces.
Tracy wrote a poem and found an outline of a butterfly online which she put around it. She chose a fancy font and colour for the poem, printed this on white paper, and then glued buttons, sequins and stickers around the butterfly outline – but you can also use recycled sweet wrappers, bottle tops and kitchen foil. Tracy then put her butterfly into a box frame, but you can use an empty box to mount it, or even the back of a cereal packet.

 This is another variation, where Tracy used a box frame – but you can use an empty box – to create an 18th birthday tribute using different shapes, colours and sizes. Again, if you don’t have any craft or art materials at home, try the recycling bag and your imagination: you can even make your own glue.

 Create your own star mobile. Click here for the instructions as a PDF, click here for the spiral template and click here for the star template.Create your own star mobile. Click here for the instructions as a PDF, click here for the spiral template and click here for the star template.
You will need a flat working space and:
- Scissors
- Silver Foil
- Star Template
- Paper Plate
- Pencil
- Glue
- Some Cotton
- Draw a spiral on your plate and then cut it out very carefully.
- Attach cotton to the middle to hang by.
- Stick the silver foil to the back of the star template. When the glue is dry, cut out the star shapes.
- Cut the cotton into different lengths. Sandwich them between two same-sized stars and glue these together.
- Attach your stars (like the circles in the picture) by their cotton threads to the spiral. You choose where and what length to hang the stars.
- Hang somewhere that will catch the light.
Make a 3-D picture or card of a vase of flowers. You can download the instructions here, and either print templates to cut out and colour (Vase Outline and Heart Shaped Petal templates, or use the instructions to make your own templates from old magazines or junk mail. (You can even make your own glue from flour and water – here is a simple recipe.)
